RSS Feed

2009

    Kelas Asas Decoupage April 2018

    BungaTelur.com akan mengadakan kelas untuk mempelajari teknik decoupage di atas pinggan seramik/cermin kayu. Semua bahan akan disediakan. Hasil kerja boleh dibawa balik.

    Jadual kelas adalah seperti berikut:

    Tarikh: 29 April 2018, Ahad

    Masa: 2:00 - 5:00 petang

    Yuran: RM80

    Tempat: Puchong (lokasi akan diberitahu kepada peserta yg serius)

    Terhad kepada 6 peserta

    Sesiapa yang berminat, sila email ke [email protected], atau sms/wa ke nombor 012 6482121 untuk maklumat lanjut. Peserta digalakkan membuat tempahan awal kerana tempat adalah terhad.

    Untuk melihat contoh decoupage yang dihasilkan oleh peserta kelas sebelum ini, sila lawati http://news.bungatelur.com atau laman Facebook BungaTelur.com

  1. Decoupage Tips

    December 22, 2009 by admin

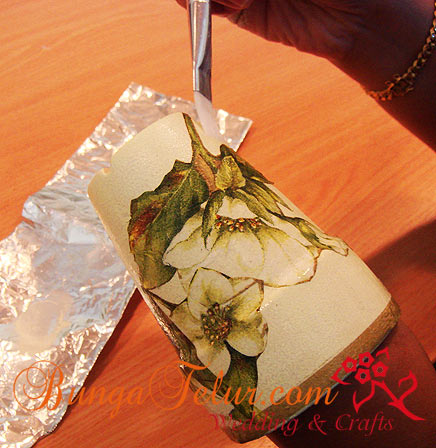
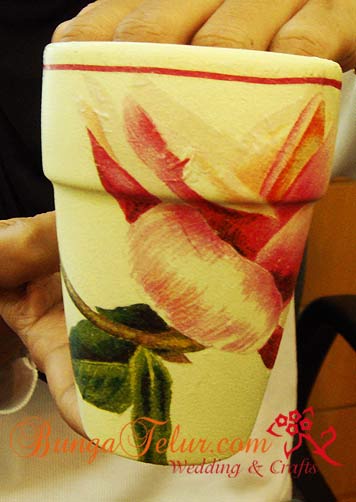
    If you have tried to do decoupage using paper napkin/serviette, you might have encountered this problem when trying to seal or glue the motif onto the surface. As the most outer layer of the paper napkin is very thin, and you use a brush to glue it, the motif will get crinkled easily. From my experience, the bigger the motif, the harder it gets to NOT get it crinkled..isk!
    decpge1

    The more you try not to get it wrinkled (as you might use your fingers to adjust the position of the motif) the worse it could get. The design might get torn or damaged in the process.

    Try using a bigger size of brush to seal the paper napkin. Load each side of the brush with the sealer or glue, and gently apply the glue on top of the napkin motif, covering as much surface as possible. The best way to ensure a long lasting effect of your craft is to let it air dry for few days (or even weeks if the project is big) before you proceed with finishing process (applying glaze medium and varnish).
  2. Decoupage Using Paper Napkins

    December 2, 2009 by admin

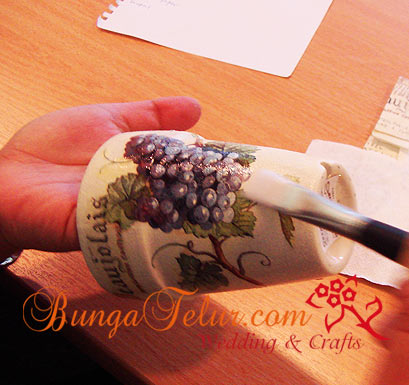
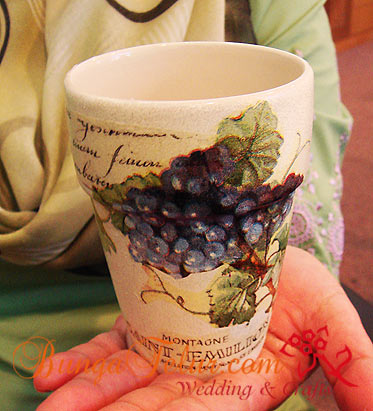
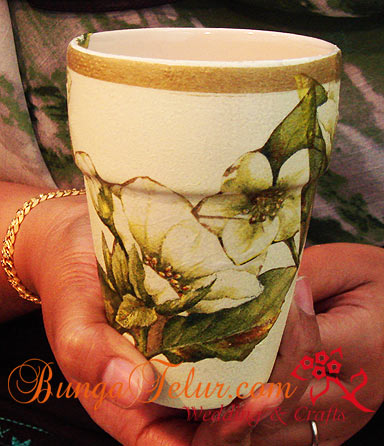
    These are the outcome from the students who attended my last decoupage class. One of them chose the motif of grapes while the other one went for floral motifs.

    class8nov091

    For my decoupage class, I usually will use paper napkins or serviettes from the IHR range. There is also decoupage paper but the method to seal (glue) the motifs to the surface will be more tedious and can’t be completed within 2 hours.

    class8nov092

    For those who are looking around to buy such paper napkins or tissue, if you are in KL/Selangor area, you can try to find them in Jusco, Metrojaya, Living Quarters and Sogo. Per pack of 20 pieces are usually sold at RM16.


  3. Decoupage Napkins Giveaway

    November 19, 2009 by admin

    giveaway1

    Na was my student. She came for decoupage and scrapbooking class when I conducted them at my home about 2 years ago. Ever since then she has been doing decoupage and selling decoupage napkins and other craft products at her online store.

    She is running a giveaway for napkins and I feel tempted to join. Who knows if my luck is there to win 10 napkins at my own choosing.

    I have browsed through almost all of her napkins collection and I can’t really list down just 10..hehe! I am torn between design of roses, herbs and fruits (which God knows when I can actually use them for decoupage) But hey, I love collecting decoupage napkins even when I can’t use them straight away.

    So here is my list of napkins.

    1. M191 (I’ve seen on Internet how they use this motif to decoupage mannequin)
    2. M064 (It has berries and mushroom)
    3. M140 (classic motif of rosa centifolia)
    4. M187 (I can always use sunflower design to brighten my day..)
    5. M233 (cherry and bottles of jam – good for kitchen plaque)
    6. M009 (more berries)
    7. M226 (pumpkin at the window)
    8. M177 (white roses – on a wooden box it will be very classy)
    9. M104 (illustrated roses, very English style)
    10.M230 (another design of rosa centifolia)

    For those who are looking to buy decoupage napkin per piece basis, feel free to visit her store or even read her blog – Raznacreation.com for ideas and tips.


  4. The Art Of Decoupage

    November 16, 2009 by admin

    It’s been a while since the last class I conducted for decoupage. There were times when I conducted this decoupage class almost every week at home. It’s an easy craft to learn and to teach to students, especially those with less ability to be artful..haha!

    decoclass1

    I am currently browsing a book titled New Decoupage: Transforming Your Home with Paper, Glue, and Scissors by Durwin Rice on Amazon.

    I think once I have enough money I will buy this book as a reference as it provides contemporary decoupage idea – not your grandmother’s decoupage: delicate Victorian or floral images on dainty plates buried under innumerable coats of heavy varnish (as quoted from the product description of the book)

    decoclass2

    For those who are interested to know about the history of decoupage, here is some info for you to read : The Art of Decoupage. And there is even a National Guild of Decoupeurs with a membership fees of USD40 annually. For in-depth history of decoupage, read it here : A Bit Of History.


  5. Gubahan Hantaran Hijau Krim

    November 10, 2009 by admin

    This entry is still on gubahan hantaran with green and cream color theme. It took me ages to upload all the pictures due to slow Internet connection these days.

    I think the idea of putting the hantaran materials in boxes are very practical as the bride and groom can always recycle the pretty boxes afterwards. I found a shop that specialized in making boxes in Puchong area and their price is very reasonable.

    hantarangreen4

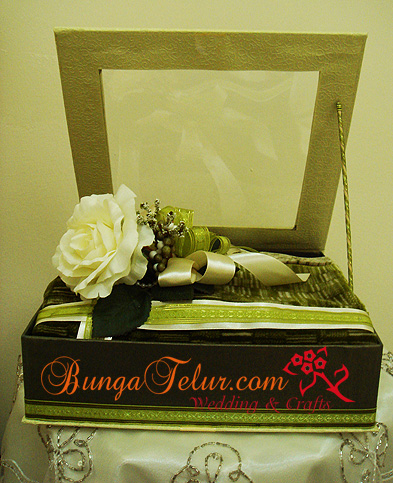
    The above box was filled with thick sejadah (praying mat). I just lined the green ribbons nicely on top of cream satin ribbon and put the artificial bunga dulang at one side. I pinned the leaves of the bunga dulang into the sejadah so that it won’t move on the wedding day itself…(you know how sometimes things go haywire with lack of forward thinking..heh!)

    hantarangreen5

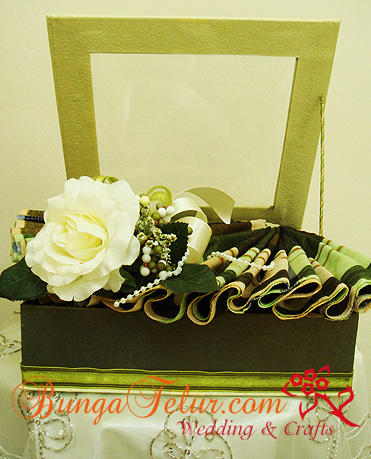
    The second box was filled with sampin which I have folded into fan shape. Deep inside the box was kain pasang for baju melayu. In a way you can save space and minimize the number of dulang hantaran to be used during the wedding..(especially if you have to rent dulang and alas dulang separately)

    hantarangreen6

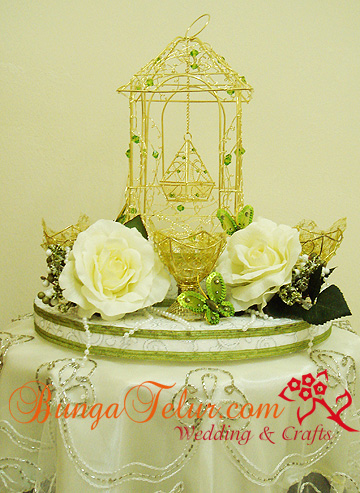
    The bride couldn’t find a miniature car to bear the ring for the groom. So I decided to buy this golden cage for bekas cincin as it was embellished with green decorative stones that could complement the wedding theme color. I also bought a few more golden wire cups which on the day before the wedding, I have filled up with bunga rampai made from old style daun pandan and rose petals.


  6. Gubahan Hantaran Perkahwinan

    November 5, 2009 by admin

    I have done this set of cream and green gubahan hantaran a few months back but I only managed to upload the picture of sirih junjung in the previous entry.

    hantarangreen1

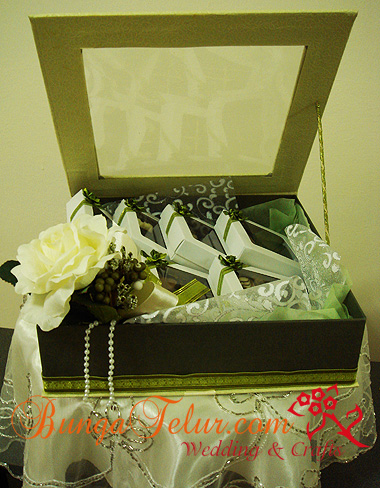
    For me, completing these cream and green gubahan was quite simple and straight forward as I already have the paper box to put in the hantaran items. Of course I have to embellish here and there to make sure that the items won’t look too bare. I put some tiny flowers and green ribbons at the top side of the chocolate boxes and arranged them nicely in the bigger box.

    hantarangreen2

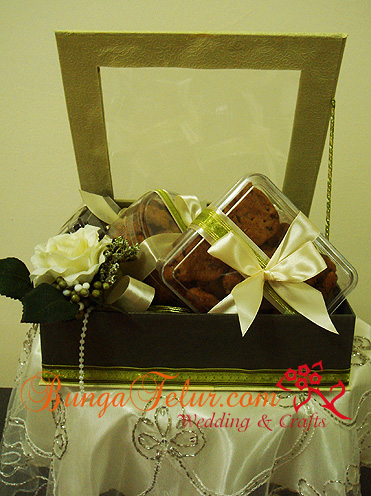
    As for the cookies, the initial plan from the bride was to arrange them in their original plastic packaging from Famous Amos but when I did that, they just looked so out of place. So I found some transparent plastic packaging (which could be bought from shop that sells baking materials like Bake With Yen), rearranged the Famous Amos cookies in them nicely, tied some matching ribbons and placed them in the main box.

    hantarangreen3

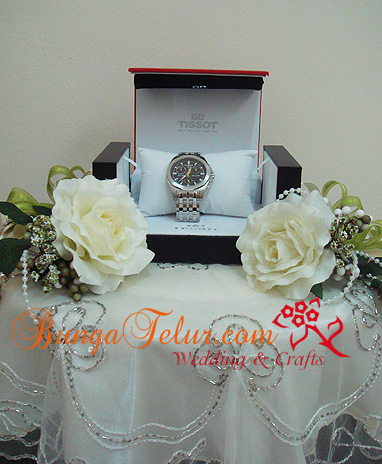
    For the watch, I didn’t touch up anything on the original box that it came in. I changed the position of the bunga dulang arrangement as if to accompany the watch box on each side. I believe that for expensive items, we need not crowd them with too much decoration, a simple one will make it more outstanding and look elegant.


  7. Scrapbooking – Another Hobby

    September 29, 2009 by admin

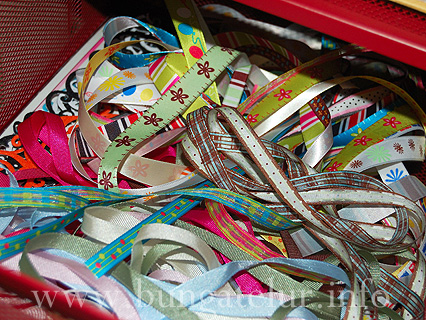
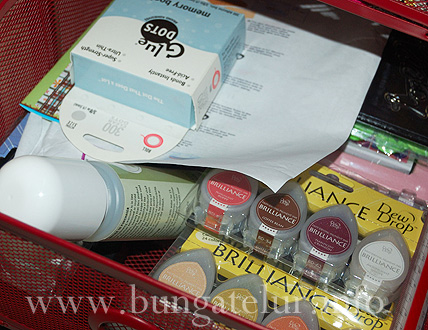
    A few years ago, I got addicted with scrapbooking. So being a person who likes to shop, I ended up filling up all the shelves and drawers with basic items and embellishments for scrapbooking. Things like ribbons, glues, stamping supplies, clear stamp, acrylic paints, chipboards, brads, stickers and patterned papers, just to mention a few..huhu!

    Most of the items I bought through ebay using money I earned from blogging, which was deposited in my paypal account. Come to think of it, I must have spent thousands if converted into local currency. But then again, that’s what you do when you have a hobby.

    See those Brilliance Dew Drop inkpads from Tsukineko in the picture above. It was great for stamping. It costs a lot more if I buy them in local scrapbooking store. Of course there are many other type of inkpads, but so far that’s what I have tried. I am very tempted to buy Tim Holtz Distress Ink after watching a demo video on twopeasinabucket.com but since I have very little free time to indulge in scrapbooking, I think I have to be patient for now.

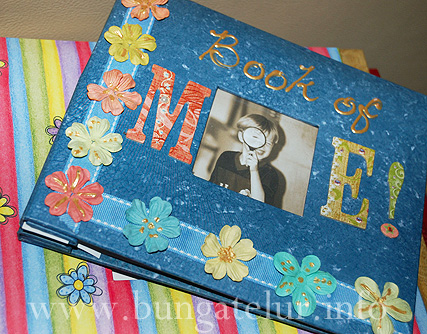
    The cover for the personal album has been done more than a year ago but till now I still don’t have time to complete the inside pages of the album. Perhaps it could be a new year resolution next year to complete that Book of Me album..haha!


  8. Sirih Junjung For Hantaran

    August 28, 2009 by admin

    For many years that I have been involved in this hantaran making and wedding related business, I have been able to come across many clients with different preferences when it comes to sirih junjung for their bertunang or wedding ceremony.

    Of course I usually will try my best to cater to their needs as long as the materials are available and the price they are willing to pay are reasonable.

    For this sirih junjung, the intial plan was to use a lot more sirih leaves. But when I went to the Indian supplier shop, I was only able to get around 30 pieces of sirih…(their last stock for the day..huhu!) Even the filler flowers are supposed to be different (I was hoping for white Gypsophila) but the florist said she only got that.

    Well, I have to make do with whatever I have in hands thus the change of design. Luckily the client was happy to see her sirih junjung when she came and collected it for her next day akad nikah ceremony.

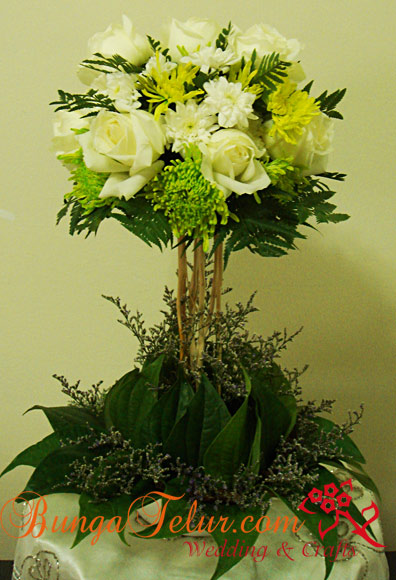
    For this particular modern style of gubahan sirih junjung, I tried a topiary design. Note to myself: next time use at least 2 dozens of roses for the topiary. Luckily I bought white, yellow and green (I think they dipped in green dye) chrysanthemum as well otherwise the top part of the topiary will look really empty.


  9. Bunga Pahar Stokin

    July 29, 2009 by admin

    I rarely do workshop for bunga stokin, reason being it takes a lot more effort to teach students to do bunga stokin compared to bunga dip or any other classes I used to conduct.

    So for those who are interested to learn how to do bunga telur stokin, grab the chance by attending my class which will be held in Putrajaya Presint 16 this 2nd August 2009. I will teach how to make butterfly using stokin as well (another favorite among students..hehe!)

    For more details, please check at my business website : http://www.bungatelur.com

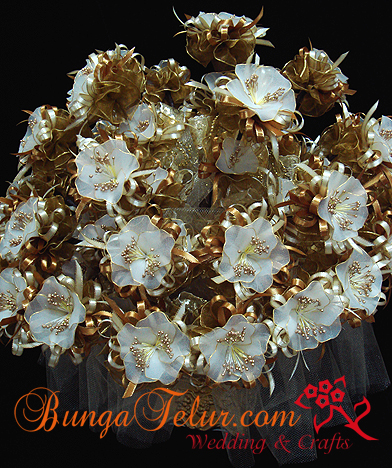
    The above bunga pahar stokin was made last year (or was it last, last year(?) for clients in KL and Brunei) It seems that the favorite wedding theme color for the previous year was gold brown..heh!


  10. More On Decoupage

    July 10, 2009 by admin

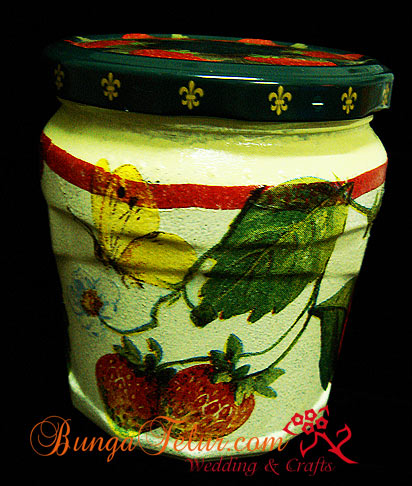
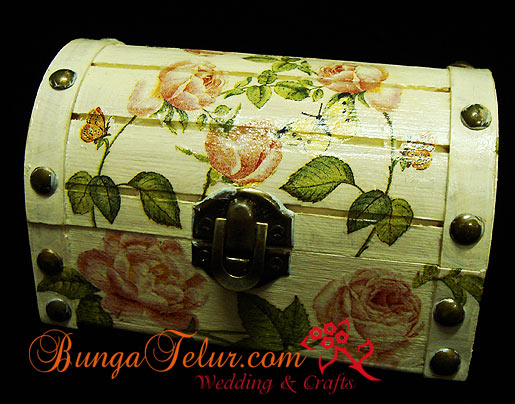
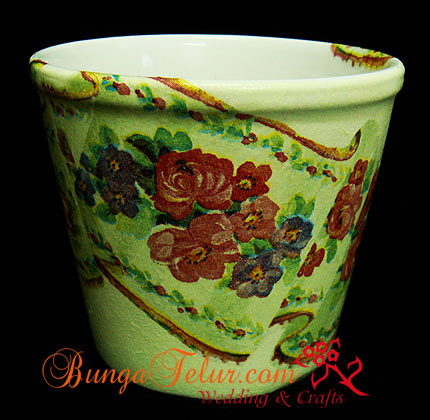
    Being new to the art of decoupage a few years ago, I was excited to do it on most of the materials I found at home – things like empty jam bottle, IKEA ceramic pot and even wooden box.

    This empty jam bottle has strawberry design on its lid, so since I got a napkin with the same design I decided to try and decoupage it. I think the color of the background is too bright, I should have tone down the yellow acrylic with some white gesso.

    It took me some times to finish up this wooden box. With wood, you have to seal the surface first, let it dry for few days and then only you can paint the background. I was impatient to finish the painting task thus the messy look at the handle and around the metal buttons. Next time I will use a smaller brush to paint at such spots.

    I got a napkin design with borders so I thought since I planned to use the ceramic IKEA pot for topiary arrangement, I might as well decoupage the border onto the pot. But up till now, I still didn’t do the topiary, so the pot has been used as the holder for all the scissors for my decoupage class..heh!